Bifold doors are prized for their sleek design and space-saving functionality. But when they are not properly aligned, they can quickly become a source of frustration. Sticking panels, uneven gaps, or doors that won’t fully close can undermine the aesthetics and functionality of any space.
For professionals like contractors, interior designers, and architects, knowing how to adjust and install bifold door aligners is crucial to avoid costly callbacks and ensure flawless performance.
This step-by-step guide is designed to help you tackle these challenges head-on and deliver results as polished as your design vision.
Let’s dive into the essentials of bifold door alignment and installation.

What is a Bifold Door Aligner?
A bifold door aligner is a small but essential hardware component that keeps bifold doors properly aligned when closed. It is typically installed on the inside edge of the doors, near the pivot or track. The aligner interlocks or guides the door panels to ensure they meet evenly, preventing gaps or misalignment that can affect the door’s functionality and appearance.
Misaligned doors can cause operational issues, damage components, and compromise the integrity of your design. For professionals, understanding how to achieve flawless alignment is non-negotiable.
You will need the right tools and materials, as well as a systematic approach to each step, to ensure a seamless installation and proper alignment.

Recommended Read:Learn how to adjust the alignment of bifold doors with practical tips and advice from the Reddit Carpentry community. Read more here.
Tools and Materials for Bifold Door Aligner Installation
Here’s a detailed table outlining the tools and materials you will need for professional-grade bifold door aligner installation:
| Category | Tool/Material | Description/Use |
| Essential Tools | Precision Screwdrivers | Phillips and flat-head screwdrivers with magnetized tips for securing hardware. |
| Professional Grade Drill | Adjustable torque settings; HSS drill bits for wood, metal, or composite materials. | |
| Laser Level | Ensures millimeter-precision alignment for horizontal and vertical planes. | |
| Measuring Tape | Heavy-duty with metric and imperial markings for accurate measurements. | |
| Carpenter’s Square | Verifies the squareness of door frames and panels during installation. | |
| Rubber Mallet | Gently taps components into position without damage. | |
| Awl or Centre Punch | Marks precise locations for drilling pilot holes. | |
| Clamp Set | Holds doors steady during alignment and installation. | |
| Allen Wrenches (Hex Keys) | Tightens or adjusts pivot pins and hex screws. | |
| Hand Saw or Oscillating Multi-Tool | Trims door components for custom modifications if needed. | |
| Materials | Bifold Door Aligners | Ensure compatibility with the door system (size, material, mechanism). |
| High-Tensile Screws | Stainless steel or zinc-plated for corrosion resistance. | |
| Wood Filler or Sealant | Reinforces pilot holes and fills imperfections in the frame. | |
| Shims | Levels doors and corrects frame irregularities. | |
| Lubricant (Silicone Spray) | Greases tracks and hinges for smooth operation. | |
| Protective Pads | Prevents damage to finished surfaces during installation. | |
| Adhesive Strips (Optional) | Temporarily holds aligners in place during adjustments. |
Pro Tip: Having backups of frequently used items, such as drill bits or screws, can save time on-site.
Recommended Watch: Watch this comprehensive guide to installing and adjusting bifold doors for a seamless fit. Check it out here.
Step-by-Step Guide: Adjusting and Installing Bifold Door Aligners
The installation and adjustment of bifold door aligners requires a systematic approach and attention to detail. This comprehensive step-by-step guide will help you achieve flawless results with precision and professionalism.
Step 1: Prepare the Workspace
Inspect the Door
Conduct a thorough inspection of the bifold door panels to identify any signs of warping, dents, or other damage that could interfere with proper alignment. Addressing these issues beforehand will save time during the installation process.
Verify the Frame
Using a laser level, confirm that the door frame is perfectly level horizontally and vertically. Additionally, use a carpenter’s square to ensure the frame corners form precise right angles. Irregularities could compromise the aligner’s effectiveness.
Mark Aligner Placement
Mark the intended locations of the aligners on the floor or frame using a pencil. Be careful to ensure these markings are precise, as they will guide your drilling and fastening steps later.
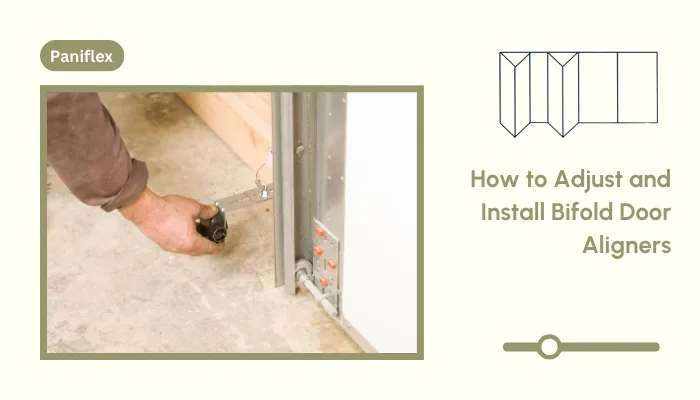
Step 2: Install the Bifold Door Aligners
Position the Aligner
Depending on the design, the bifold door aligner should be placed at its intended location. This is usually near the pivot point at the bottom of the door or along the track system. This step requires careful attention to ensure the aligner is positioned symmetrically with the door panels.
Drill Pilot Holes
Drill pilot holes at the marked locations using a power drill equipped with the appropriate bit for your door material. Pilot holes help prevent material splitting and provide a guide for the screws. They allow for a clean and professional installation.
Secure the Aligner
Fasten the aligner into place using high-tensile screws that are suitable for the material of your door frame or floor. Tighten the screws gradually and evenly to avoid shifting the aligner out of position during this step.
Test Initial Fit
After securing the aligner, gently open and close the door panels to verify that it does not impede their movement. This preliminary test will help identify any adjustments that might be needed before finalizing the installation.
Suggested Watch: Discover expert tips and tricks for installing and aligning bifold doors in this helpful tutorial. Watch it here.
Step 3: Adjust the Door Panels
Loosen the Aligner Screws
If adjustments are necessary, slightly loosen the screws on the aligner. This will allow you to fine-tune its positioning without fully detaching it, saving time and effort.
Align the Panels
Carefully adjust the door panels so they align perfectly with each other and the surrounding frame. Use a laser level to confirm that the panels are even, both horizontally and vertically.
Check the Gaps
Inspect the spaces between the door panels and the frame, ensuring that they are consistent on all sides. Uniform gaps contribute to the door’s aesthetic appeal and functional efficiency.
Re-tighten Screws
Once you are satisfied with the alignment, securely tighten the aligner’s screws to lock it into its adjusted position. This ensures the aligner will maintain its placement over time.
Step 4: Perform Final Adjustments
Inspect the Entire Assembly
Conduct a comprehensive review of the entire door assembly. Pay close attention to the aligner, track, and pivot points. Confirm that all components are securely fastened and properly positioned.
Grease the Mechanisms
Apply a silicone-based lubricant to the door tracks, hinges, and pivot points. This will reduce friction, allowing the doors to operate smoothly and quietly.
Test Door Movement
Open and close the doors several times, carefully observing their movement. Look for any signs of sticking, noise, or uneven operation that might indicate a need for further adjustments.
Fine-Tune as Necessary
Make any additional adjustments to the aligner or pivot pins to ensure the doors function flawlessly. Repeat the testing process until the operation is completely smooth.
Step 5: Finishing Touches
Clean the Installation Area
Remove any dust, debris, or pencil marks from the workspace, leaving the area clean and professional in appearance. A tidy workspace reflects attention to detail, an essential quality for professionals.
Inspect for Aesthetics
Take a final look at the door panels to ensure they are flush and visually appealing. The aligner should be discreetly installed and blend seamlessly with the overall design.
Document Adjustments
Record the locations of the aligners and any significant adjustments made during the installation. This documentation can be valuable for future maintenance or modifications.
Even with the most detailed and carefully executed installation process, unexpected challenges can still arise. These hurdles can test your skills and require quick, effective solutions to maintain the quality of your work. In the next section, we will cover some common challenges you may encounter and how to overcome them like a pro.

Recommended Read: Facing issues with misaligned bifold doors? Find practical solutions and advice from the Reddit DIY community here.
Challenges and Solutions in Installing Bifold Door Aligners

Bifold door installations can present a few challenges that require skill, patience, and creative problem-solving. Here are some common hurdles you may encounter during the process:
| Challenge | Description | Solution |
| Uneven Door Frames | Warped or uneven frames can cause gaps or sticking panels. | Use shims to correct irregularities and verify alignment with a laser level and carpenter’s square. |
| Misaligned Door Panels | Panels may not align properly, causing operational issues or uneven gaps. | Loosen pivot screws and realign panels using a level; position the aligner correctly to maintain even spacing. |
| Material-Specific Issues | Hard materials like hardwood or metal can be challenging to drill or fasten. | Use high-quality drill bits, create pilot holes, and apply steady pressure to avoid damage or stripped screws. |
| Door Track Problems | Damaged or poorly installed tracks hinder smooth door movement. | Inspect and repair or replace damaged tracks; clean the track to ensure proper functionality. |
| Limited Adjustability | Some aligners may not offer enough range for precise fine-tuning. | Select professional-grade adjustable aligners and test their range of motion before installation. |
| Inadequate Tools | Substandard tools can lead to imprecise installation and damaged components. | Invest in high-quality, professional-grade tools suitable for the specific door system. |
| Aesthetic Challenges | Ensuring aligners remain discreet while maintaining functionality. | Choose aligners with finishes matching the door or designed to be low-profile and unobtrusive. |
| Communication with Clients | Clients may not understand the complexity of achieving precise alignment. | Set realistic expectations, explain the process, and provide visual demonstrations if necessary. |
Pro Tip: Conduct a pre-installation assessment to identify potential challenges early. This proactive approach ensures you are fully prepared, leading to a smoother and more professional installation process.
Custom Door & Mirror: Finish Your Projects with Confidence and Style
Installing and adjusting bifold door aligners is a fine balance of precision, technique, and expertise. When done correctly, they ensure your doors function smoothly and look flawless, delivering the high-quality finish your clients expect. But even the best aligners need to work with well-made doors to achieve truly outstanding results.
At Custom Door & Mirror, we provide high-quality bifold and sliding doors engineered for style. Our advanced production process leverages cutting-edge automated equipment, including CNC routers, computerized cutting tables, bevelers, and banders. This equipment is seamlessly integrated with R2D2 software.
Our state-of-the-art system ensures unmatched precision, whether you are ordering for a large-scale construction project or a single-door shipment. Explore our range of custom closet doors, or reach out for expert guidance to meet your needs.
Schedule a consultation by calling (631)-414-7725 or using our online form.
Frequently Asked Questions
Can I install a bifold door aligner on any type of bifold door?
Most aligners are compatible with standard bifold doors. However, your door’s specific design and material might require a particular type of aligner. Therefore, always check compatibility with the door manufacturer or supplier.
How do I correct uneven gaps between the door panels?
Uneven gaps are typically caused by misaligned pivot pins or frames. Adjust the pivot screws and aligner position using a level. You should ensure uniform gaps by inserting shims if necessary.
Why do my bifold doors stick after installation?
Sticking doors may result from debris in the track, misalignment, or insufficient lubrication. To ensure smooth operation, clean the track, recheck alignment, and apply a silicone-based lubricant.
Can I adjust the aligner after installation?
Yes, most aligners allow for post-installation adjustments. Loosen the screws slightly, reposition the aligner as needed, and retighten to secure it in the new position.
What should I do if the frame is not perfectly square?
If the door frame is uneven, use shims to level it before installing the aligner. This ensures proper alignment and prevents stress on the door panels.


