Sliding glass doors combine spatial efficiency with a minimal, architectural finish, but their performance is only as good as the installation. Misaligned tracks, uneven subfloors, or incorrect anchoring can compromise both function and appearance, leading to friction, panel instability, or visible gaps.
We understand that even experienced professionals often face tight deadlines and varying site conditions, making the precise installation of sliding glass doors a challenging task. This guide is designed to support professionals working with these variables, providing a step-by-step framework for accurate installation.
Ready to experience the benefits of custom closet doors? Explore our range of Paniflex products now.
TL;DR
- Sliding glass doors need precise installation. Small errors can cause big issues.
- Check levels, dimensions, and surfaces before you start. Use the right tools.
- Custom doors fit the space exactly. No shimming or cutting required.
- Clean the tracks. Tighten hardware. Inspect rollers every few months.
Tools and Materials Needed
Before beginning the sliding glass door installation, confirm that all necessary tools and components are present and suitable for the site’s specific conditions. Working with glass panels and precision tracks requires stability, alignment, and care, both in handling and in setup.
The list below covers standard requirements:
Tools For Installing a Sliding Glass Door
- Measuring tape: For accurate height and width verification
- Level (24″ or longer): For confirming plumb walls and level floors
- Drill and assorted drill bits: For securing tracks into wood, metal, or masonry
- Screwdriver (manual or powered): For fine control during fastening
- Pencil or chalk line: To mark alignment and track position
- Rubber mallet: For gentle adjustments without damaging frames
- Shims: To compensate for floor or wall irregularities
- Vacuum or broom: To clear debris prior to installation
Materials & Components Needed
- Top track and bottom guide: Matched to door height and panel configuration
- Glass panels: Pre-measured and fabricated; handle with clean gloves
- Mounting screws and anchors: Suitable for the surface type (drywall, wood, concrete)
- Roller assemblies or hanging hardware: As specified by the system design
- Stop blocks or bumpers: For limiting panel travel and soft stopping
- Protective gear: Safety glasses and gloves for handling glass and drilling
You should double-check part numbers and finishes to ensure compatibility before beginning work. Minor discrepancies in track length or mounting hardware can lead to alignment issues later in the process.
Once all tools and components are accounted for, the next step is to assess the site itself. A proper sliding glass door installation relies on both hardware and the condition of the opening, making pre-installation checks crucial.
Suggested Watch: Watch this video for a step-by-step guide.
Pre-Installation Checklist
Accurate installation begins with thorough preparation. Before unpacking hardware or marking the wall, confirm that the site conditions and measurements align with the door system’s specifications.
This checklist outlines the critical steps to complete before your sliding glass door installation begins:
1. Verify All Dimensions
- Measure the rough opening: wall-to-wall and floor-to-ceiling at multiple points.
- Confirm that the opening height matches the specified door system height, accounting for top track and bottom guide clearance.
- Note any inconsistencies (e.g., sloping floors, bowed walls) that may require shims or adjustments.
2. Inspect Surface Conditions
- Ensure walls are plumb and floors are level.
- Look for obstructions such as baseboards, trims, or electrical fixtures that may interfere with track installation.
- Clean the area thoroughly since dust, debris, or uneven surfaces can affect hardware seating and alignment.
3. Confirm Wall and Floor Composition
- Identify the wall type (drywall over stud, masonry, or metal framing) to select the correct anchors and screws.
- For concrete or tile floors, ensure you have the appropriate masonry drill bits and fasteners.
4. Review Door Panel Specifications
- Verify that the panel quantity, width, height, and glass type align with the project requirements.
- Inspect panels for shipping damage, chipping, or manufacturing defects before proceeding.
5. Check System Components
- Lay out all tracks, guides, rollers, bumpers, and fasteners.
- Match each component to the installation plan and door configuration (e.g., two-panel bypass, three-panel stack, soft-close integration).
- Verify that the hardware is free from defects, meets finish requirements, and is ready for installation.
Completing this checklist ensures that installation proceeds without interruption and that the final result meets performance and alignment standards. Precision at each stage, from track alignment to panel hanging, will directly impact the door’s performance, stability, and finish quality.
Suggested Read: DIY Ideas for Replacing HVAC and AC Closet Doors
Step-by-Step Installation Process
Installing a sliding glass door system requires sequencing each task with precision and care. Minor misalignments during track placement or panel mounting can lead to operational issues that are difficult to correct later.
The following steps are outlined to help maintain structural alignment, ensure smooth panel movement, and achieve a consistent visual appearance.
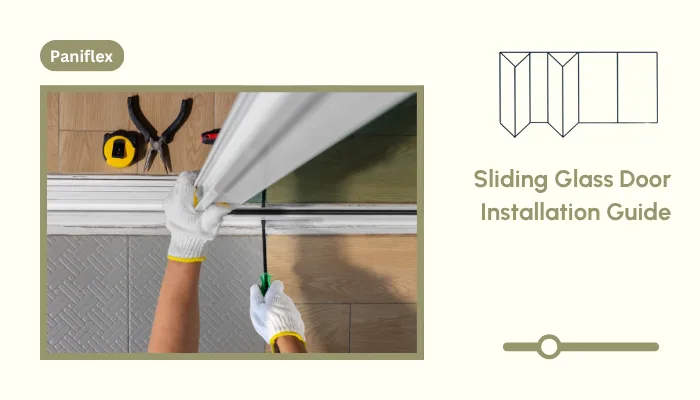
1. Prepare the Opening
Begin by clearing the installation area of any obstructions, dust, or loose materials. Use a long level to confirm that the floor is even and the walls are plumb. If the surface is uneven, plan to use shims to establish a uniform base before mounting hardware. This step ensures that all subsequent components will align correctly and perform as intended.
2. Mark and Install the Top Track
Measure the total system height and mark the top track position accordingly. Use a level to draw a continuous line across the header area where the track will be mounted. Drill pilot holes in alignment with the track’s mounting slots and secure it firmly to the structure, checking the level after fixing each end. The track must be straight and stable to support the weight and movement of the glass panels.
3. Position and Fasten the Bottom Guide
With the top track in place, determine the correct position for the bottom guide to ensure the panels travel in line. Measure from the top track down and mark the centerline where the guide should sit. Once aligned, secure it to the floor using screws or anchors suitable for the subfloor material. It is crucial for the guide to sit flush and stay securely in place under lateral pressure.
4. Hang the Glass Panels
Lift the first glass panel carefully and tilt it to insert the top edge into the upper track. Once the rollers are engaged, lower the panel slowly into the bottom guide, making sure it settles evenly. Continue with the remaining panels, spacing them as required by the system configuration. Ensure that each panel glides smoothly and clears adjacent surfaces without resistance.
5. Adjust Panel Height and Alignment
Once all panels are in place, use the built-in adjustment screws on the roller assemblies to fine-tune the vertical alignment. This helps to even out gaps between panels and ensure that they hang parallel to the wall and floor. Adjustments should be incremental, with movement tested after each change. Proper alignment contributes directly to smooth operation and long-term performance.
6. Secure Stops and Test Operation
Install doorstops or bumpers inside the top track to prevent the panels from over-traveling. Open and close each panel fully to verify glide quality, spacing, and alignment with the guide system. Ensure that stops are correctly placed and that there is no lateral sway or noise during operation. Make any necessary final adjustments before concluding the installation process.
7. Final Inspection
Inspect the entire system visually and mechanically to ensure it is functioning correctly. Confirm that all fasteners are tight, panels are level, and the track and guide system are clean and free of obstructions. Operate the doors through multiple open-close cycles to verify smooth and consistent motion. A precise final check ensures that the installation meets both functional and design standards.
Even with a methodical approach, specific issues tend to recur during the installation of sliding glass doors. These mistakes are often the result of overlooked details, site variability, or time constraints. Identifying them in advance provides for corrective action before they affect alignment, movement, or system stability.
Common Installation Mistakes to Avoid
Sliding glass door systems depend on precision at every stage. While the sliding glass door installation process may appear straightforward, minor oversights can lead to friction, uneven panel movement, or premature wear.
You can avoid rework and ensure a clean, functional result by being mindful of the following:
1. Misaligned Top Track
If the top track is installed even slightly off level, panels may drift, bind, or fail to stay in place when opened. This compromises both function and appearance.
Solution: Use a long level during installation and verify alignment after securing each end of the track.
2. Incorrect Bottom Guide Placement
When the bottom guide is off-center or not square to the top track, it causes lateral friction and uneven travel paths. This often results in panels rubbing or resisting movement.
Solution: Align the guide precisely using plumb lines or measurements from the top track before fastening it to the floor.
3. Using Inappropriate Fasteners
Mounting hardware that is not suited to the wall or floor material often loosens over time, especially under repeated use. This can affect system stability and potentially damage surrounding surfaces.
Solution: Select anchors and screws based on substrate type, such as wood, metal stud, or masonry, and confirm that they are load-rated.
4. Ignoring Irregular Wall or Floor Conditions
Out-of-plumb walls or sloped floors introduce gaps, stress points, and poor panel fit if not corrected during the setup process. These site conditions are often missed during fast-paced installations.
Solution: Identify inconsistencies during the pre-installation phase and use shims or modified mounting positions to compensate.
5. Rushing Final Adjustments
Uneven panel height or tilt may not be evident until after installation, but poor adjustment leads to long-term wear and visual imbalance. This step is often skipped under pressure to meet deadlines.
Solution: Take time to adjust roller assemblies gradually, test panel movement, and confirm parallel alignment with adjacent surfaces.
A well-installed sliding glass door system performs reliably from the start, but its long-term performance also depends on proper maintenance. Regular maintenance preserves smooth operation while also protecting the system’s appearance and structural integrity. The following care practices help extend the lifespan of the installation and minimize the need for adjustments or repairs.
From the Community: Need to install a sliding glass door without extensive hardware? Check out this Reddit thread.
Post-Installation Maintenance Tips
Once installed, sliding glass doors require minimal upkeep, but neglecting routine maintenance can lead to diminished performance, visible wear, or hardware failure over time. Consistent care preserves both function and finish, especially in high-use environments.
Explain these tips to your clients to help them get the most out of their sliding glass door:
- Keep Tracks and Guides Clean: Dust and debris in the track can affect panel movement and cause noise. Clean tracks regularly using a vacuum or soft brush. Avoid oil-based lubricants unless specified by the manufacturer.
- Inspect Rollers Periodically: Check roller assemblies for wear, sticking, or uneven movement every few months. Use the adjustment screws to adjust the height or alignment as needed. Early adjustments prevent long-term damage.
- Use Proper Cleaning Materials: Clean glass with a soft cloth and non-ammonia cleaner. Avoid abrasive pads or harsh chemicals that can scratch the surface. For frames, use mild soap and dry thoroughly.
- Check Fasteners and Anchors: Over time, screws can loosen due to movement or changes in temperature. Inspect hardware every six months and tighten as needed. Pay special attention to track ends and guides.
- Prevent Impact and Overloading: Do not lean heavy objects against the doors or allow them to slam shut. Even with strong materials, repeated impact can affect alignment. Handle panels with care during daily use.
While a standard sliding glass door can meet basic functional needs, it often falls short when precision or architectural consistency is required. To bridge the gap between off-the-shelf limitations and professional expectations, custom fabrication becomes a more reliable solution.
Suggested Read: How to Install Sliding Closet Door Floor Guides on Various Surfaces
How Do Custom Sliding Glass Doors Make Installation Easier?
Sliding glass doors must glide smoothly, fit precisely, and align cleanly with the surrounding architecture. Standard-sized panels often fall short when dealing with irregular openings, floor-to-ceiling spans, or wall-to-wall installations. This leads to time-consuming site modifications, inconsistent clearances, and hardware misalignment.
Custom sliding glass doors solve these issues by being fabricated to exact project specifications. With tighter tolerances and flexible configurations, custom systems eliminate the guesswork during installation. Installers do not have to cut, shim, or compromise; instead, they work with components engineered to fit the space perfectly.
The result is a faster installation, improved panel movement, and a cleaner finish with minimal post-installation adjustments. Custom doors also allow greater control over hardware selection and panel materials, enabling choices that suit both performance demands and design goals. This is especially important when working with mirrored or frosted glass, where panel stability and visual alignment are critical.
Custom Door & Mirror applies this level of precision to every system they manufacture. Their sliding glass doors are built to exact dimensions. Their advanced hardware, including patented cam-hinge mechanisms and adjustable tracks, ensures smooth operation even in challenging installations.
Additionally, their focus on ease of installation is evident in the design of the products. Panels are designed with a focus on precision tolerances, minimizing the need for on-site adjustments. Their mounting systems are compatible with a range of wall and floor types.
These features make Custom Door & Mirror a preferred choice for professionals seeking to strike a balance between ease of installation and high-end performance in sliding door systems.
Suggested Read: Installing Sliding Closet Doors Over Carpet
Ready to experience the benefits of custom closet doors? Explore our range of Paniflex products now.
Conclusion
Installing sliding glass doors requires careful planning, accurate measurement, proper hardware integration, and attention to detail at every stage. Avoiding common errors, following a structured installation process, and maintaining the system regularly all contribute to a smoother glide, cleaner visual lines, and fewer service calls down the line.
If your next project demands sliding glass doors that install cleanly, fit with precision, and hold up under real-world use, Custom Door & Mirror is ready to support your goals. With over six decades of experience in custom fabrication, our systems are built to meet exact specifications.
Contact us to explore our available styles, download technical specifications, or request a consultation for your upcoming project.
Frequently Asked Questions
How to install a sliding door step by step?
Begin by preparing the opening and ensuring that the surfaces are level. Install the top track and bottom guide, then hang the panels. Adjust for height and alignment, secure stops, and test operation to ensure smooth, even movement.
Should a sliding glass door be flush with the floor?
Not entirely. The bottom guide typically requires minimal clearance, but complete flush mounting is avoided to ensure smooth travel, proper drainage, and hardware protection. Slight elevation prevents debris interference and reduces wear over time.
Do all sliding doors need a bottom track?
Most sliding door systems require a bottom guide or track to stabilize panel movement and prevent swinging. However, some top-hung systems use concealed guides instead. The specific design depends on weight, span, and performance requirements.
What is the common problem with sliding doors?
The most common issues include misaligned tracks, worn rollers, and debris buildup in guides. These problems cause sticking, uneven movement, or noise. Regular maintenance and accurate installation prevent most of these performance failures.


