Picture this: you’re standing in front of a client’s closet, tasked with transforming a cluttered, uninspired space into a sleek, functional haven. As an interior designer or architect, you know that the key to this metamorphosis lies in the perfect closet doors – doors that seamlessly blend style and practicality, elevating the overall aesthetic while providing smooth, reliable operation. But where do you begin with how to install closet doors? How can you ensure that your closet door installation not only meets but exceeds your client’s expectations?
Enter our comprehensive guide on how to install closet doors, explicitly crafted with design professionals like you in mind. In this article, we’ll dive deep into the intricacies of closet door installation, sharing expert tips and techniques that will help you navigate this process with confidence and finesse. From selecting the perfect doors for your client’s space to mastering the art of precise measurements and secure installation, we’ll walk you through every step of the journey, empowering you to create closet spaces that are as beautiful as they are functional.
Choosing the Right Closet Doors for Your Design

When selecting closet doors for your design project, consider the following factors to ensure the best fit for your client’s space and style:
- Sliding doors: These space-saving doors are perfect for smaller closets or rooms with limited clearance, offering a sleek and modern look. However, they may limit access to the entire closet interior and can sometimes jump off the track if not installed correctly.
- Bi-fold doors: Bi-fold doors are an excellent choice for medium-sized closets, as they require minimal floor space and provide easy access to the entire closet interior. However, they may not offer a seal that is as tight as other door types and can be more prone to wear and tear over time.
- Hinged doors: Traditional hinged doors offer a classic, timeless appearance and work well for more enormous closets, providing a comprehensive, unobstructed opening. However, they require more swing space and may not be the best choice for smaller rooms or tight layouts.
Also Read: Bifold Closet Door Sizes Guide
As a designer, consider the overall theme, color palette, and material finishes of the room when choosing closet doors to create a cohesive and polished look. Paniflex offers a wide range of custom closet door options, allowing you to personalize your design with various styles, colors, sizes, and panel configurations to perfectly match your client’s preferences and the room’s aesthetic.
Also Read: How to Install and Replace Closet Doors
Have you completed the first section on installing closet doors? If so, let’s look at the tools and materials you will need.
Tools and Materials for Professional Installation

To ensure a precise and efficient closet door installation, equip yourself with the following tools and materials:
- Hammer: A sturdy hammer is essential for removing old doors and molding and tapping hinges into place.
- Chisel: A sharp chisel will help you create precise cutouts for hinges, ensuring a flush fit.
- Drill/power drill: You’ll need a drill or power drill to create pilot holes for screws and to drive screws into place.
- Screwdriver: A reliable screwdriver will be necessary for installing hinges, ball catches, and other hardware.
- High-quality hinges: Invest in durable, high-quality hinges to ensure smooth operation and longevity.
- Ball Catch: Ball catches help keep your closet doors securely closed and aligned.
- Dummy doorknob: A dummy doorknob provides a polished look without the need for a latch mechanism.
- Slab doors: Slab doors are the foundation of your closet door installation. They are available in various materials and finishes to suit your design.
Investing in quality tools and hardware will not only make the installation process smoother but also guarantee lasting results for your clients.
Also Read: Start to Finish Guide: Installing a New Interior Door Frame
Have you found the materials you need to answer your question about installing closet doors? Awesome! Let’s move on to the next step.
Preparing the Closet Frame

Before installing new closet doors, take the time to prepare the closet frame properly:
- Verify that the door frame is square to prevent any alignment issues that could affect the door’s functionality. Use a measuring tape to check the diagonal distances from corner to corner. If the measurements are equal, your frame is square. If not, you may need to make adjustments before proceeding.
- Carefully remove any existing doors and track systems, noting any unique challenges or requirements for the space. Properly dispose of old doors and hardware, or discuss recycling options with your client.
- Clean and prep the top of the door frame, ensuring a smooth surface for the new door installation. Remove any debris, old paint, or obstructions that may interfere with the new doors.
Are you all set? Great. Let’s move on to taking those crucial measurements to ensure a perfect door fit.
Measuring and Trimming Doors for a Perfect Fit
Accurate measurements are the foundation of a successful closet door installation. Follow these steps to achieve a flawless fit:
- Remove any existing doors and molding to access the door frame fully.
- If necessary, add a filler piece to adjust the door frame height, ensuring compatibility with your new doors. This step may be required if the old doors were a different size or if the frame has settled over time.
- Measure the door opening precisely, double-checking both the width and height. It’s crucial to measure at multiple points to account for any irregularities in the frame.
- Trim each door side as needed to create a snug fit within the frame, allowing for proper clearance and smooth operation. Use a circular saw or table saw to make precise cuts, and sand the edges for a clean finish.
Also Read: Simple Methods to Trim the Bottom of a Door
In our quest to understand “how to install closet doors,” – precision cutting is behind us. It’s time to bring on the hardware and hang those doors perfectly.
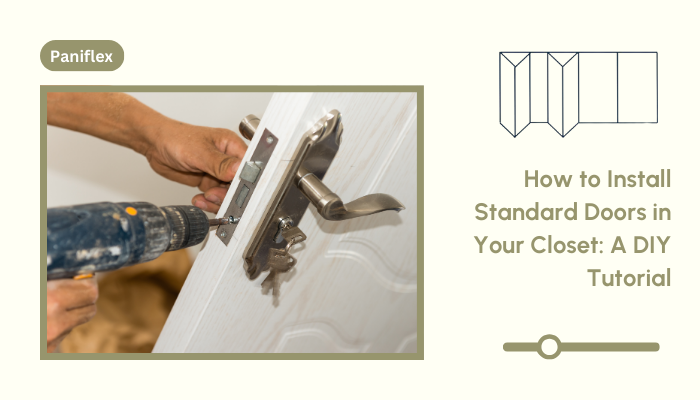
Installing Hinges and Hanging Doors
With your doors measured and trimmed, proceed with installing the hinges and hanging the doors by executing the following steps:
- Use a pencil and butt marker to accurately mark the hinge locations on both the door and frame. Ensure the hinge placement is consistent across all doors for a uniform appearance.
- Using a chisel, create cutouts for the hinges, ensuring a flush fit. Take your time and work carefully to avoid damaging the door or frame.
- Securely attach the hinges to the doors and frame, paying close attention to proper alignment. Use a drill or screwdriver to fasten the hinges in place, checking that they are level and straight.
- Hang the doors on the frame, making necessary adjustments to achieve even height and smooth operation. Use shims to fine-tune the door placement, ensuring they swing freely without rubbing against the frame or each other.
Installing Ball Catches for Secure Closure
To ensure your closet doors close securely and maintain proper alignment, install ball catches by carrying out the following steps:
- Prepare the top of the doors by hollowing out a space for the ball catches, following the manufacturer’s guidelines. Use a chisel or router to create a precise recess for the catch to sit flush with the door surface.
- Install the ball catch plates on the door frame, aligning them precisely with the catches on the doors. Use a drill or screwdriver to fasten the plates in place securely.
- Adjust the tension of the ball catches to achieve a secure yet smooth closing action. Test the doors repeatedly to ensure they close and latch properly, making any necessary adjustments to the catch tension or alignment.
You’re almost there to understand how to install closet doors! A few maintenance tips will help keep your doors operating smoothly for years to come.
Maintenance and Troubleshooting

To ensure the longevity and smooth operation of your newly installed closet doors, follow these maintenance and troubleshooting tips:
- Regularly clean the tracks, hinges, and hardware with a soft cloth or brush to remove dust and debris that may cause sticking or jamming. Lubricate moving parts with a silicone-based spray to maintain smooth operation.
- Periodically tighten any loose screws or hinges to prevent sagging or misalignment. Check the doors for any signs of wear or damage, and address any issues promptly to avoid further deterioration.
- If your doors are not closing correctly, first check the alignment of the hinges and ball catches, making adjustments as needed. Ensure the catches are engaging correctly and that the doors are not rubbing against each other or the frame.
- For sliding doors, regularly inspect the track for any debris or obstructions that may hinder smooth operation. Clean the track thoroughly and ensure the rollers are correctly lubricated. If the doors are jumping off the track, check that the track is level and adjust the roller height if necessary.
- If you encounter any persistent issues or damage that cannot be easily repaired, consult with a professional or the manufacturer for guidance on replacement parts or more extensive repairs.
By following these maintenance and troubleshooting guidelines, you can help your clients keep their closet doors looking and functioning like new for years to come.
Just in case you still have questions about installing closet doors, let’s tackle a few FAQs that might clarify things.
FAQs (Frequently Asked Questions) About How To Install Closet Doors
- Can I install closet doors without professional help?
- Yes, with the right tools, materials, and guidance, installing closet doors is a manageable DIY project for most homeowners. However, as a designer or architect, your expertise and attention to detail can ensure a flawless installation that meets your clients’ high standards.
- How do I know if my closet door frame is square?
- Use a measuring tape to check the diagonal distances from corner to corner. If the measurements are equal, your frame is square. If not, you may need to make adjustments before installing your new doors. For a visual guide on how to check if your frame is square, check out this helpful tutorial video.
- What if my closet door is too tall for the frame?
- You can trim the door to fit the frame using a circular saw or handsaw. Measure carefully and make small, incremental cuts to ensure a precise fit. This video tutorial demonstrates how to trim doors for a perfect fit.
- How do I maintain my closet doors to ensure they last?
- Regular cleaning, tightening of hardware, and prompt troubleshooting of any issues will help extend the life of your closet doors. For more tips, refer to the maintenance and troubleshooting section of this guide.
- How much does it cost to install interior doors?
- According to research by Kukun, the average interior door installation cost ranges from $470 to $1,601, with most homeowners spending around $1,024. By offering your clients a professional installation service, you can help them save money while ensuring a high-quality result.
Addressing these common questions and concerns will equip you to guide your clients through the closet door installation process and provide them with tailored solutions that meet their unique needs and preferences.
With all that knowledge packed in, let’s wrap things up and look forward to your DIY success story.
Conclusion
Installing closet doors is crucial to creating functional and stylish storage spaces for your clients. By following this comprehensive guide on how to install closet doors, interior designers and architects can ensure precise measurements, smooth installation, and secure closure of standard closet doors. The key to success lies in selecting the right doors for the space, using quality tools and materials, and paying attention to the finer details of the installation process.
As a design professional, your expertise and eye for detail can elevate a simple closet door installation into a sleek and stylish design feature that perfectly complements your client’s space. By partnering with Paniflex and leveraging their extensive range of customizable closet door options, you can create genuinely one-of-a-kind solutions that showcase your design skills and leave your clients thrilled with the final result.
So, whether you’re working on a new build, a renovation, or a simple closet upgrade, use this guide as your go-to resource for mastering the art of closet door installation. With your newfound knowledge and the support of Paniflex’s quality products, you’ll be able to tackle any closet door project with confidence and finesse, cementing your reputation as a skilled and innovative designer.


