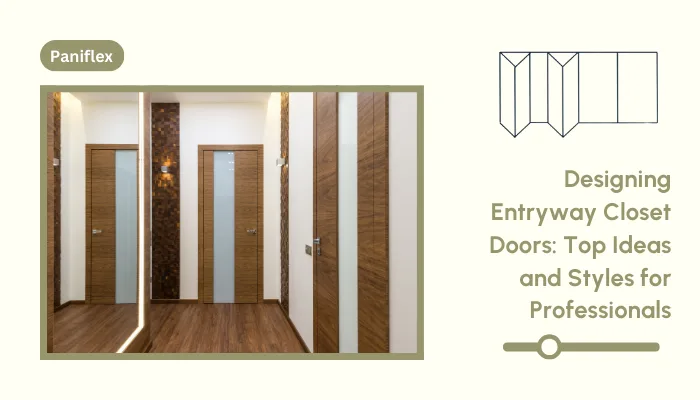
You know the devil is in the details as an interior designer or architect. Properly hung interior doors play a crucial role in creating seamless, functional spaces. Whether working on a high-end residential project or a commercial space, understanding how to hang an interior door can elevate your designs and ensure client satisfaction. Let’s dive into a professional-grade guide that will help you perfect this essential skill.
Overview and Preparation

Before we begin, ensure you have all the necessary tools and materials. For a professional installation, you’ll need:
- Pre-hung door (saves time and ensures proper fit)
- Shims (for precise adjustments)
- Level (crucial for accuracy)
- Brad nailer and nails (for quick, secure fastening)
- Drill with countersink bit (for clean screw installation)
- Deck screws (provide strong, lasting hold)
- Drywall spackle (for a smooth finish)
- Sanding sponge (to blend repairs seamlessly)
- Trim caulk (for a polished look)
- Paint, brushes, and rollers (for final touches)
- Utility knife (for precise cuts and trimming)
- Square (to ensure perfect angles)
- Circular saw (for any necessary frame adjustments)
- Pencil (for marking measurements and cut lines)
Also Read:
With these tools ready, you’re set to tackle the installation process efficiently and professionally.
Assess and Prepare the Door Frame
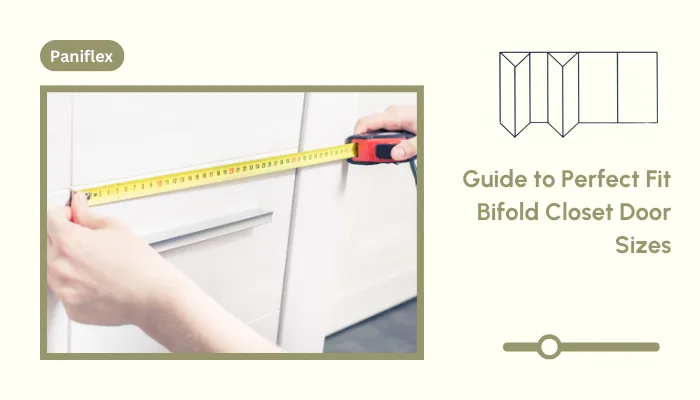
The foundation of a well-hung door lies in a properly prepared frame. Here’s how to ensure your starting point is perfect:
- Check the floor for level using an extended level. If the floor is not level, make necessary adjustments using a circular saw. This step is crucial for preventing issues with door swing and closure.
- Examine the sides of the rough opening, making any required modifications for a square fit. Use a framing square to check corners and adjust as needed. A properly squared opening will make the rest of the installation much smoother.
Remember, precision at this stage will save you time and frustration later. Taking extra care here can prevent numerous issues.
Now that the frame is perfectly prepared let’s move on to the exciting part—positioning the door.
Also Read: Simple Steps to Install a Pre-Hung Interior Door
Placing the Door in the Opening

Now comes the crucial moment of positioning the door:
- Carefully lift and place the door assembly into the rough opening. Having an assistant for this step is best to ensure proper handling and prevent damage.
- Use shims under the door to keep it stable and prevent falling. Place these shims strategically to support the weight evenly and maintain the door’s position.
- Ensure the door sits flush with the opening. At this stage, use your level to check both vertical and horizontal alignment.
This step requires a steady hand and a keen eye for alignment. Take time to get it right; proper placement here will make subsequent steps much more accessible.
Securing the Hinge Side

With the door in place, it’s time to secure it:
- Install shims above the top hinge, ensuring correct placement. The shims should fit snugly without forcing the frame out of alignment.
- Nail or screw the frame to the stud to keep it flush with the drywall. Use your level frequently to maintain plumb as you work.
- Repeat the process for the center and bottom shims. Your consistent approach will ensure the door hangs straight.
- Double-check for level and plumb after securing each point. Make minor adjustments as needed before moving on.
Your expertise in hanging an interior door shines here. Precise shimming is critical to a smooth operating door.
Also Read: How to Determine Door Swing Direction and Handing Guide
With the door securely in place, let’s focus on getting the striker side just right.
Securing the Striker Side
The striker side requires equal attention:
- Place shims at the same height as the hinge side. This ensures the frame remains square and level across its width.
- Use the door itself as a reference to set the striker side properly. Close the door to check the reveal (gap) between the door and frame and adjust the shims for an even gap.
- Securely attach the frame to the stud. As with the hinge side, use screws or nails, checking for plumb as you go.
Consistent gaps will ensure professional results. An adequately aligned striker side will ensure smooth operation and a satisfying close.
Almost there! Let’s ensure everything is polished and ready for the final touches.
Final Adjustments and Preparation for Finish
As we near completion, attention to detail becomes paramount:
- Remove the shims from below the door. The door should now hang freely and operate smoothly.
- Use a utility knife to snap off excess shims flush with the drywall.
- Use drywall spackle to fill nail and screw holes. A putty knife ensures a smooth application by slightly overfilling to allow for shrinkage as it dries.
- Attach pre-painted trim now if you are using it. Measure and cut precisely for a professional finish. If painting on-site, install unfinished trim at this stage.
- Caulk the frame and trim, and sand the nail heads until flush. This step creates a seamless transition between the door frame and wall, elevating the overall look.
Also Read: Simple Methods to Trim the Bottom of a Door
These finishing touches will elevate your work from good to exceptional, showcasing your attention to detail.
With everything secured and aligned, it’s time for the finishing touches to make your installation stand out.
Painting and Hardware Installation
The final steps bring your vision to life:
- Paint caulked seams and trim with precision, using a brush for small areas and a roller for larger sections. This two-tool approach ensures a smooth, even finish in all areas.
- Reattach the door to the frame if it was removed during painting. Ensure you align the hinges properly and tighten the screws.
- Install hinges and attach the door handle and striker. Align these components carefully for smooth operation and a polished look.
Also Read: Popular Front Door Colors and Their Meanings
These final, crucial steps culminate in your expertise in hanging an interior door. Take your time to ensure everything is perfect.
Conclusion
Mastering how to hang an interior door is invaluable for any interior design or architectural professional. Following this detailed guide ensures that every door you install operates smoothly and complements your overall design vision. Remember, the key to a perfect installation lies in careful preparation, precise measurements, and attention to detail.
For those looking to elevate their projects further, consider exploring Paniflex’s range of custom closet doors. Their bifold and sliding door designs offer unique opportunities to enhance interior spaces. With Paniflex’s quality craftsmanship and expert installation skills, you’ll create remarkable interiors that impress clients and stand the test of time.
Ready to take your door installations to the next level? Visit Paniflex to discover how their custom solutions complement your expert hanging techniques and elevate your next project. Their specialists can provide additional insights on integrating their products seamlessly into your designs.