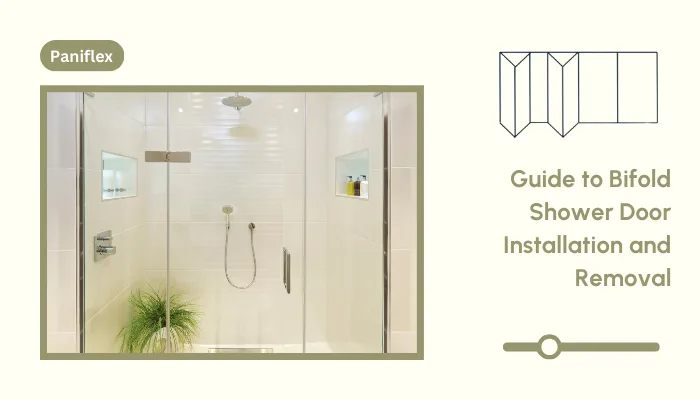
Installing shower doors can be challenging, especially where tight spaces and tricky designs are concerned. Professionals often struggle to get the perfect fit while maintaining efficiency. A single misstep can lead to delays and extra costs. Bifold shower doors offer a stylish, space-saving solution, but improper installation can cause headaches.
Ready to experience the benefits of custom closet doors? Explore our range of Paniflex products now.
In this guide, we will provide step-by-step instructions to ensure a smooth, efficient process. We will also address common installation and removal issues. Whether you are working on a residential or commercial project, we will help you tackle the complexities with ease.
What are Bifold Doors?

Bifold doors are a type of door system that folds in on itself, much like an accordion. They consist of two or more panels that are hinged together. When opened, the panels slide and fold neatly to one side.
This design makes bifold doors perfect for spaces where traditional swinging doors might be impractical, such as smaller bathrooms or tight areas. Unlike hinged doors, bifold doors don’t require extra space to swing open, maximizing the available room.
Why Choose Bifold Shower Doors?
Bifold shower doors provide several advantages that simplify installation and reduce long-term maintenance. Here’s why bifold shower doors are a go-to choice:
- Space-saving: Perfect for tight spaces, allowing for smoother and faster installation without swing clearance.
- Efficient Installation: Simple setup with minimal adjustments, reducing labor time.
- Durable Materials: Built to withstand high traffic and heavy use, ensuring fewer callbacks.
- Low Maintenance: Fewer moving parts mean less long-term maintenance and repair work.
- Customizable Fit: Easily adaptable to various layouts, offering flexibility for different projects.
- Reliable Performance: Ensures a secure, water-tight seal for dependable functionality.
Now, let’s walk through the installation and removal process. This will help ensure a trouble-free experience from start to finish.
Step-by-Step Bifold Shower Door Installation

Installing bifold shower doors can seem daunting. However, it can be a straightforward process with the right tools and a little know-how. Here’s a step-by-step guide to ensure that your installation goes smoothly:
1. Prepare the Shower Area
Start by ensuring the shower area is properly framed, level, and square. Any wall or floor inconsistencies can affect the door’s alignment and operation.
- Level the Walls: Use a spirit level to ensure that the walls are perfectly vertical.
- Check the Floor: Ensure the shower base is level to prevent misalignment when fitting the bifold doors.
2. Gather the Right Tools
You will need a few basic tools for the installation:
- Power drill with screwdriver bits
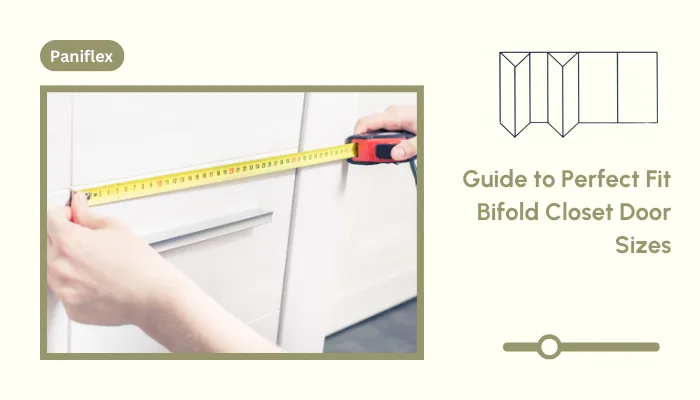
- Measuring tape
- Spirit level
- Pencil for marking
- Adjustable wrench
- Silicone sealant for waterproofing
3. Install the Top Track
Begin by fixing the top track to the wall. This track is essential for guiding the door and ensuring its smooth movement.
- Mark Placement: Use a pencil to mark where the top track will sit, ensuring it’s level.
- Drill Holes: Pre-drill holes into the wall at the marked locations.
- Fix the Track: Attach the top track using screws, ensuring it is level.
4. Install the Bottom Track
Next, install the bottom track. This track will guide the door’s bottom rollers, so make sure it aligns perfectly with the top track.
- Align with Top Track: Measure to ensure both tracks are aligned.
- Secure the Track: Use screws to attach the bottom track to the shower floor. If the floor is uneven, you may need to trim the track slightly for a better fit.
5. Hang the Door Panels
This step requires some finesse. When opened, each bifold door consists of two panels that fold against each other.
- Fit the Rollers: Attach the rollers to the top and bottom of each panel.
- Install the Panels: First, hang each door onto the top track, then lower the bottom rollers into the bottom track.
- Adjust the Rollers: Adjust the height of the rollers to ensure the door hangs properly and slides smoothly.
6. Secure the Hinges and Handles
Once the door panels are in place, secure the hinges and handles.
- Attach the Hinges: Use screws to fix the hinges on the doors. Ensure they are tight to prevent any wobble.
- Install the Handles: Mark the appropriate spot for the handles on the door and drill holes. Then, screw in the handles securely.
7. Seal the Edges
Finally, you need to apply a silicone sealant bead along the edges of the door frames. This will prevent water from leaking and create a clean, professional finish. Use a damp cloth to smooth out the sealant for an even finish.
If you are working with existing bifold doors, you might need to remove them before installing a new set. The following section will walk you through the steps to safely remove the old doors. This will allow you to make way for the new installation without causing any damage.
Suggested Read: This blog provides a detailed guide on installingbifold mirror closet doors. It covers everything you need to know for a smooth installation.
How to Remove Bifold Shower Doors
Removing bifold shower doors can be necessary during renovation or if the doors need to be replaced. While the process is fairly simple, it requires careful handling to avoid damage to the door or surrounding tiles. This is what you need to do:
- Start by removing the handles and any screws holding the hinges in place. Use a screwdriver or drill to undo these fasteners and set them aside for reinstallation.
- Once the hinges are removed, lift the door panels off the tracks. You may need to gently lift the top panel to release the rollers from the top track, then slide the bottom rollers out of the bottom track.
- After the door panels are removed, you can take out the tracks. Start with the top track, unscrewing any fasteners that hold it in place. Then, remove the bottom track in the same way.
Pro tip: If you plan to install new doors or leave the area open, clean up the edges where the tracks used to be fixed.
Bifold doors can be tricky for the best contractors. Experienced professionals may face hurdles, especially when striving for precision in tight spaces or ensuring the perfect fit. These obstacles can cause delays, affect the quality of the installation, and even lead to costly mistakes if not properly addressed.
Common Challenges While Installing Bifold Shower Doors
Here are some common challenges you may encounter during the installation process, along with practical solutions to tackle them efficiently:
Un
Uneven Walls or Floors
Uneven walls or floors can pose significant challenges when installing shower doors. Misalignments may result in improper door functionality, gaps, or instability. These issues are common in older homes or areas where construction tolerances weren’t strictly maintained. Identifying these irregularities early ensures that corrective measures are applied before installation begins.
Solution: Before installing, ensure the shower area is thoroughly level. A laser level can help align the tracks precisely. You can also use adjustable mounting brackets or shims to compensate for any unevenness.
Accurate Measurements
Accurate measurements are the backbone of any successful shower door installation. Even a slight miscalculation can lead to poor fitting, operational issues, or even structural compromise. Precise dimensions are particularly crucial for custom or frameless shower doors where tolerances are minimal.
Solution: Double-check all measurements before cutting or installing any components. Use high-quality measuring tools and allow for slight adjustments to ensure an exact fit. For added accuracy, consider using a digital caliper or measuring laser for critical dimensions.
Weight and Size of Doors
Shower doors, particularly those made of glass, can be heavy and unwieldy. Mishandling can result in injury, damaged panels, or compromised structural integrity. Proper planning and support are essential to avoid these risks.
Solution: Use proper lifting equipment or a second pair of hands to handle heavy panels safely. During installation, a door dolly or support brace can ease the load and prevent damage.
Track Alignment
Proper track alignment is vital for the smooth operation of sliding shower doors. Misaligned tracks can cause the doors to jam, slide unevenly, or wear out prematurely. Ensuring level and secure placement is a critical step.
Solution: Invest in a quality spirit or laser level to ensure tracks are perfectly aligned horizontally and vertically. Secure temporary supports during the setup to prevent shifts before the tracks are fully fixed.
Sealing Issues
Poor sealing can lead to water leakage, mold growth, and structural damage in the bathroom. Ensuring a tight, water-resistant seal is essential for both functionality and aesthetics.
Solution: Use high-quality silicone sealant along all edges where the door meets the wall or shower base. Apply a continuous bead of sealant and smooth it out with a caulking tool for a consistent, water-tight seal. Ensure the sealant is suitable for high-moisture areas.
Limited Space for Installation
Installing shower doors in small bathrooms or tight spaces can be challenging due to restricted movement and tool accessibility. Without careful planning, these constraints can slow the installation process and lead to mistakes.
Solution: Pre-plan and organize tools to maximize the limited space. Use compact, portable tools that allow you to work efficiently in confined areas. Consider modular components that are easier to maneuver in tight spaces.
Handling of Glass Panels
Glass panels are fragile and require careful handling to avoid scratches, chips, or breakage. Improper handling not only jeopardizes the installation but can also lead to safety hazards.
Solution: Always use suction cups or specialized glass-handling tools when lifting and moving glass panels. If working with large glass pieces, it’s advisable to use protective padding around the edges to prevent chipping or cracking.
Adjusting Rollers and Hinges
Rollers and hinges ensure the smooth operation of shower doors. Improper adjustment can cause doors to stick, scrape, or fail to close properly. Attention to detail is key to ensuring long-term performance.
Solution: After installation, test the door’s movement and adjust the roller height and hinge tension as needed. Use the manufacturer’s instructions for fine-tuning and gradually make all adjustments to avoid damaging the door mechanism.
By understanding the challenges in advance, professionals can proactively address them, ensuring a smoother installation process and a durable, high-quality result.

You can get more information on this Reddit thread, where users discuss the challenges of replacing traditional bathroom doors with bifold ones.
The Importance of Custom Cuts for Bifold Shower Doors
One of the most important factors in achieving a flawless installation is ensuring that the doors are cut to the exact dimensions of the space. While off-the-shelf doors might seem like a quick solution, they often don’t provide the perfect fit for unique or irregular shower areas. This is where custom cuts for bifold shower doors make a significant difference.
- Reduced Labour Time: With doors pre-cut to the exact dimensions, contractors spend less time making adjustments during installation, helping to meet project deadlines and improve efficiency.
- Minimises On-Site Adjustments: Custom cuts eliminate the need to trim doors on-site, which can cause delays or inaccuracies in installation.
- Improved Door Functionality: A perfect fit means smoother operation, reducing the risk of door binding, misalignment, and wear-and-tear issues that require future maintenance.
- Less Risk of Installation Errors: Pre-cut doors are designed specifically for the space, reducing the potential for mistakes that can occur with off-the-shelf solutions.
- Better Aesthetic Results: Custom cuts ensure clean, professional lines, contributing to a high-quality finish that reflects well on the contractor’s work and the overall project.
Custom cuts for bifold shower doors ensure a perfect fit, enhanced performance, and a visually appealing installation. They allow contractors and designers to easily handle any space and guarantee high-quality results for every project.
Achieve Perfect Results with (Paniflex) Custom Door & Mirror
Paniflex offers a powerful solution for contractors and designers seeking precision and efficiency. Our custom-cut bifold doors and mirrors are engineered to fit any space perfectly. They eliminate the need for time-consuming adjustments or compromises.
Paniflex products enhance the space’s functionality and contribute to a high-quality, professional finish that will impress clients. By choosing Custom Door & Mirror, you invest in a hassle-free experience, ensuring your projects run smoothly while delivering exceptional results every time.
Ready to experience the benefits of custom closet doors? Explore our range of Paniflex products now.
Schedule a consultation today by calling (631)-414-7725 or using our online form.
Frequently Asked Questions
How do I measure for bifold shower doors?
Accurate measurements are crucial for a perfect fit. Measure the width and height of the opening, accounting for any irregularities in the wall or floor. Always measure in multiple spots and use the smallest dimension to avoid installation issues.
How do I ensure a clean, professional finish with bifold doors?
Custom-cut doors are designed to fit precisely, resulting in cleaner lines and better overall aesthetics. Apply silicone sealant around the edges to ensure a seamless, watertight seal and a polished, high-quality finish.
What should I do if the bifold doors aren’t sliding smoothly after installation?
Ensure the rollers are adjusted correctly. If the doors are heavy, check the alignment of the tracks and make any necessary adjustments. Ensure that all hinges and rollers are secure and functioning properly.


