Installing bifold barn doors can transform any space. They add a rustic, charming, and functional design element to residential and commercial environments. However, the installation process can be tricky without the right approach. You are not alone if you have struggled with uneven doors, misaligned tracks, or complicated instructions. This step-by-step guide is designed to help you avoid common pitfalls and deliver a smooth, hassle-free installation for your clients.
Whether you are new to bifold barn doors or looking to refine your skills, this guide will provide you with the expertise needed to execute a flawless installation every time.

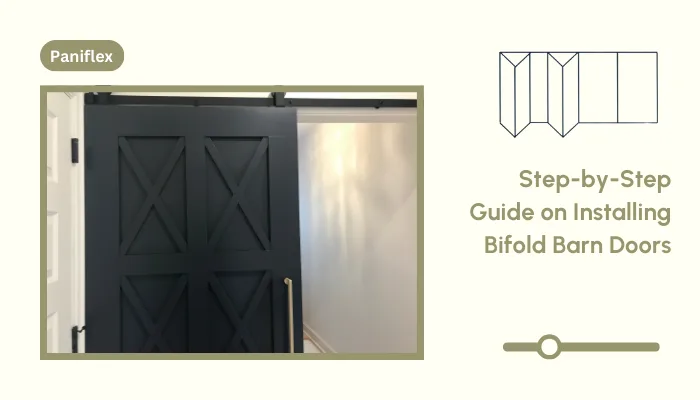
What is a Bifold Barn Door?
A bifold barn door features two panels that fold in half when opened, typically along a track system mounted on the wall. These doors are often used in spaces where a traditional swinging door would take up too much room. The “barn door” style includes sliding hardware. This usually features a decorative track and rollers that allow the door to slide smoothly open and close.
Bifold barn doors are recommended for spaces where traditional doors may not be practical. They are perfect for small rooms or areas with limited clearance, as they require less space to operate. These doors are ideal for closets, pantries, and laundry rooms where space-saving is a priority. In homes with open floor plans, bifold barn doors work well as stylish room dividers, creating privacy without obstructing the flow of the space.
Tools and Materials You Will Need

Before you begin, ensure you have all the necessary tools and materials for a smooth installation. Here’s an expanded list:
- Bifold Barn Door Kit (including track, rollers, hinges, and mounting hardware)
- Measuring Tape for accurate measurements
- Level to ensure everything is aligned properly
- Drill and Drill Bits (for both wood and metal, depending on the surface)
- Screwdriver for attaching hardware
- Stud Finder to locate wall studs
- Saw (if adjustments are needed to the door size)
- Pencil for marking positions
- Wood Screws (for securing the track and brackets)
- Hinges for connecting the doors
- Safety Goggles and Gloves to protect yourself during installation
To ensure a smooth installation, follow these detailed steps for a professional, high-quality result that both you and your client will appreciate.
Step 1: Measure the Space and Door Size
Accurate measurements are the foundation of a successful bifold barn door installation. Follow these steps to get the correct dimensions:
- Measure the Opening: Start by measuring the width and height of the doorway. For bifold doors, you should measure the width across the door opening and add a bit more room on each side to allow for smooth operation (typically 2–3 inches on each side). Measure the height from the floor to the top of the door frame, ensuring no obstructions above.
- Determine Door Size: The bifold doors should cover the opening completely when closed. For instance, if you have a 60-inch-wide opening, you will likely want two 30-inch doors (if using two panels). Keep in mind that bifold doors are typically sold as a pair, with the width of each door being half of the total opening.
- Check for Clearance: Consider the ceiling height and any nearby obstacles (like light fixtures, molding, or electrical outlets). If needed, adjust the door size or track height to avoid interference.
Step 2: Locate the Wall Studs
Bifold barn doors are heavy, and securing the track to the wall studs is critical for ensuring a solid, stable installation. Here’s how to do it properly:
- Use a Stud Finder: Start by using a stud finder to locate the studs along the wall where the track will be mounted. Mark the location of the studs with a pencil. Studs are usually spaced 16–24 inches apart but double-check this spacing to ensure alignment with your hardware.
- Verify Placement: Once you have located the studs, use a level to confirm that they are aligned horizontally along the wall. If you are not attaching the track to a stud, use heavy-duty anchors (or consult the door kit for specific instructions).
- Mark Track Placement: Use a pencil to mark the placement of the top of the track on the wall. The track will typically be positioned about 2-3 inches above the door frame for clearance, but refer to your specific barn door kit for exact measurements.
Step 3: Install the Door Track
The track holds the doors in place and allows them to slide smoothly. Here’s how to install it correctly:
- Align the Track: Using a level, align the track horizontally on the wall where you’ve marked the stud locations. Make sure the track is centered above the doorway to ensure the doors will hang evenly.
- Drill Pilot Holes: Drill pilot holes into the wall studs at the marked positions. If you are mounting the track to drywall without studs, you will need to use heavy-duty drywall anchors. Ensure the holes are drilled at the correct height and spacing for your door hardware.
- Attach the Track: Secure the track to the wall by driving screws into the pilot holes. Tighten the screws, but don’t over-tighten, as it may strip the threads. Double-check the alignment with a level before finalizing the installation.
Step 4: Attach the Rollers to the Doors
The rollers allow the door panels to slide along the track. Here’s how to install them:
- Position the Rollers: Place the rollers onto the top of the door panels. Most kits will provide specific instructions for where the rollers should be placed. Different designs may require different placements.
- Attach the Rollers: UsiAttache rollers securely to the doors. M using a screwdriver or drillake sure to follow the manufacturer’s instructions for proper placement, and tighten the screws until they are firm, but avoid over-tightening.
- Ensure Smooth Movement: Before continuing, test the rollers by manually sliding them along the track to ensure the doors glide smoothly. If they don’t slide easily, check the alignment of the track and rollers.
Step 5: Install the Bottom Guides
The bottom guide keeps the bifold doors stable and prevents them from swinging out of alignment. Here’s how to install it:
- Position the Bottom Guide: Measure the desired location of the bottom guide along the floor. The guide should be centered beneath the opening of the doors, where the two panels will fold.
- Mark the Guide Placement: Use a pencil to mark the positions for the holes where the guide will be mounted. Be sure to mark the exact center of the door opening to ensure alignment.
- Attach the Guide: Drill pilot holes into the floor, and then install the bottom guide using screws. Depending on the surface, you may need wall anchors or masonry screws for certain floors.
Step 6: Hang the Doors
Now, the moment of truth: hanging the bifold doors. This is where you bring everything together:
- Lift the Doors into Place: Carefully lift each door and hang it onto the track. The rollers should sit securely inside the track, allowing the door to slide.
- Adjust the Height: If necessary, adjust the height of the doors using the roller brackets. This ensures the doors are hanging evenly and that there is no gap between the doors and the floor. Use a level to confirm that the doors are straight.
- Secure the Doors: Once the doors are properly aligned, tighten all the screws on the roller brackets and secure the doors firmly in place. Ensure that the doors are functioning correctly before continuing.
Step 7: Attach the Hinges
The hinges allow the doors to fold open and close smoothly. Here’s how to attach them correctly:
- Align the Hinges: Position the hinges between the two bifold doors. Depending on your kit, you may need to install them at both the top and bottom of the doors.
- Secure the Hinges: Use a drill to drive screws into the pre-drilled holes in the doors. Tighten them enough to hold the hinges in place, but ensure they can still move freely when the doors are opened or closed.
- Test the Folding Action: Gently fold the doors to make sure they open and close smoothly. If they seem tight, double-check the hinge alignment and adjust if needed.
Step 8: Final Adjustments and Test
This step ensures everything is functioning properly and looks great:
- Check Alignment and Level: Stand back and inspect the doors to ensure they are aligned and level. If anything looks off, make small adjustments to the track or door height.
- Test the Operation: Slide the doors open and close several times to make sure they move smoothly along the track. If you notice resistance, inspect the track, rollers, and bottom guide for any issues.
- Tighten All Screws: Once everything is aligned and functioning properly, tighten all screws and hardware to ensure the installation is secure.
Step 9: Add Finishing Touches
The finishing touches will elevate the look of your bifold barn doors:
- Install Handles or Pulls: Choose handles that complement the barn door style. Depending on your client’s preferences, you may opt for rustic pull handles or modern lever handles.
- Add Decorative Elements: If desired, add decorative hardware like decorative corner brackets, sliding door locks, or custom trim for a unique, personalized touch.
Once you have completed the installation steps for the bifold barn doors, it’s important to keep in mind several key considerations to ensure the doors function properly and look great in the space. While following the installation guide ensures a solid foundation, focusing on these essential factors can make the difference between a good installation and an exceptional one.
Key Considerations When Installing Bifold Barn Doors

Installing bifold barn doors requires more than just following a set of instructions—it’s about creating a smooth, functional, and aesthetically pleasing solution for your clients.
Here are several key considerations to ensure that each installation is successful, durable, and meets the highest standards:
Suggested: A Reddit user shared their experience and found success by taking these precautions. You can read more about their insights on Reddit.
- Accurate Measurements: Ensure the door size fits the opening with extra space for smooth operation.
- Quality Track and Hardware: Choose durable, high-quality track and rollers suited for the door’s weight and style.
- Wall Studs: Secure the track to wall studs for stability; use wall anchors if studs aren’t available.
- Leveling and Alignment: Ensure the track is level and rollers are aligned to avoid uneven door movement.
- Clearance and Space: Verify there’s enough room for the doors to open fully without obstruction.
- Bottom Guide: Install a bottom guide to maintain door stability and prevent swinging.
- Door Material and Weight: Select appropriate materials and ensure the track supports the door’s weight.
While key considerations are essential for a successful bifold barn door installation, the best results are often achieved with custom doors. Custom doors ensure a perfect fit and seamless integration into your space. They are created as per your exact measurements. They eliminate gaps or misalignments and offer superior functionality.
Conclusion: Choose Custom Door & Mirror for the Best Fit
Installing bifold barn doors can be a rewarding project that enhances both the functionality and aesthetic of any space. By following the step-by-step process outlined in this guide, you can ensure a smooth, professional installation every time.
Paniflex (Custom Door & Mirror) specializes in custom closet doors, offering a range of high-quality bifold and sliding door designs that boost the functionality and aesthetics of any space. We stand out because of our attention to detail and commitment to delivering products that meet the highest quality standards.
This is what makes Custom Door & Mirror the best choice for your projects:
- Precision Manufacturing: Using advanced automated equipment like CNC routers and computerized cutting tables, we ensure every door is made with accuracy and reliability.
- Bespoke Designs: We can procure doors in a unique size, style, or finish to meet your project’s needs.
- Quality Materials: Only the highest-quality materials are used, ensuring durability and a luxurious feel.
- Perfect Fit: Paniflex guarantees that every door is cut and designed to your exact specifications, ensuring a flawless fit.
- Quick Turnaround: Our streamlined production process allows us to deliver custom doors quickly without compromising on quality.
- Comprehensive Support: Our detailed installation guides and videos can help you achieve a hassle-free installation process.
Discover the wide range of bifold and sliding doors that Custom Door & Mirror can create for you. Schedule a free consultation to discuss your project’s custom door requirements. Call (631)-414-7725 or use our online form.
Frequently Asked Questions
What type of wall material is best for installing bifold barn doors?
It’s important to mount the track to wall studs for a secure and stable installation. If you are working with drywall, use heavy-duty anchors or toggle bolts. In the case of brick, concrete, or tile, masonry anchors or screws are essential. Always check the wall material before proceeding to ensure the correct mounting system is used.
How do I handle uneven floors when installing bifold barn doors?
Uneven floors can cause the doors to misalign, affecting their smooth operation. Before installation, use a leveling tool to check the floor’s evenness. Consider using shims or an adjustable bottom guide to compensate if the floor is uneven. In some cases, installing a floor track can provide extra stability and reduce the impact of the uneven surface.
Can I install bifold barn doors without a bottom guide?
While it’s technically possible to install bifold barn doors without a bottom guide, it’s not recommended. The bottom guide ensures the door panels stay aligned and prevents them from swinging or shifting off track. For smooth and consistent operation, it’s crucial to use a bottom guide, especially in high-traffic areas.
What should I do if the bifold doors are too heavy for the track?
If the doors are too heavy for the standard track, you may need to upgrade to a more robust track system. Look for a track rated to support heavier door panels, and ensure the rollers are designed for the additional weight. Paniflex offers specialized hardware for heavy-duty applications, ensuring your bifold doors operate smoothly without the risk of failure.
How do I ensure the bifold barn doors will be stable after installation?
Double-check that the track is securely mounted to the studs, the rollers are properly aligned, and the bottom guide is installed correctly to ensure the doors remain stable. If you notice any movement or instability, make adjustments to the roller height or the track alignment. Additionally, tightens all screws and hardware to prevent loosening over time.


