As an interior designer or architect, you understand the critical role that proper door frame construction plays in the overall success of your custom closet projects. A well-framed door opening not only ensures structural integrity but also enhances the aesthetics and functionality of the door. In this comprehensive guide, we’ll walk you through the step-by-step process of building and framing a door opening, highlighting the importance of each stage. By mastering these techniques, you’ll be able to create stunning custom closet doors that perfectly complement your design vision.
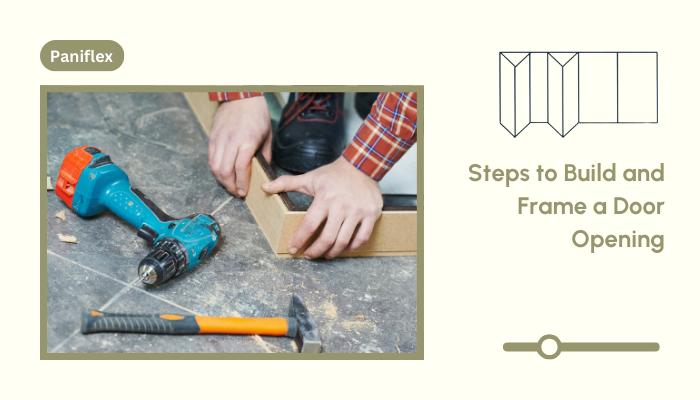
Choosing Materials and Tools

The foundation of a successful door frame construction project lies in selecting the right materials and tools. Begin by choosing a pre-hung door that aligns with your project dimensions and style preferences. As discussed on Reddit, if you have limited tools, opting for a premade jamb can simplify the task. These can be found easily and affordably at building material resellers like Restore. Additionally, pre-hung doors are recommended for ease of installation, as they save considerable labor time compared to making a frame from scratch.
When it comes to framing lumber, quality is key. Opt for straight, defect-free 2x4s, and take the time to carefully inspect each piece before purchasing. In addition to lumber, you’ll need a variety of tools and materials, including:
- Nails
- Construction adhesive
- Saw (circular saw or miter saw)
- Level
- Hammer
- Measuring tape
- Carpenter’s square
- Safety glasses
- Work gloves
Remember, investing in high-quality tools and materials will not only make the construction process smoother but also ensure the longevity and durability of your door frame.
Now that you’ve got everything ready, let’s dive into setting the stage for a perfect frame.
Preparing the Door Opening
Before you start framing, it’s crucial to accurately measure and prepare the door opening. This step lays the groundwork for a precise and well-fitted frame. Begin by measuring your pre-hung door, paying close attention to its width and height. Use these measurements to calculate the necessary dimensions for the rough opening, which will accommodate the frame. As a general rule, add an extra 1/2 inch to the width and 1/4 inch to the height to allow for proper clearance and adjustment.
When replacing Victorian door frames, it’s essential to coordinate with a professional due to potential difficulties like non-standard frame sizes and uneven openings. Buying oversized lumber to custom fit each board is crucial, as older houses often do not have standard dimensions. Ensure the frames are parallel, plumb, and level during installation.
Next, mark the outline of the rough opening on the wall, using a level to ensure straight lines. If you’re working with an existing wall, carefully remove any drywall or obstruction within the marked area. For new construction, frame the rough opening using 2x4s, ensuring the sides are plumb and the top and bottom are level.
With a clear path in front of you, it’s time to start hammering out the frame itself.
Framing the Door Opening
With the rough opening prepared, it’s time to start constructing the door frame. Follow these steps to create a sturdy and precise frame:
- Cut and fix the top and sole plates: Measure and cut the top and sole plates to the appropriate length, based on the width of your rough opening. Secure these plates to the rough opening using nails or construction adhesive.
- Mark and install the king studs: King studs are the vertical 2x4s that run from the top plate to the bottom plate, providing the main structural support for the frame. Mark their positions on the top and sole plates, ensuring they are plumb (vertically straight). Install the king studs, nailing them securely in place.
- Cut and install the jack studs: Jack studs are shorter vertical 2x4s that support the door header. Cut the jack studs to the appropriate length, which should be the height of the rough opening minus the combined thickness of the top plate, sole plate, and header. Align the jack studs with the king studs and nail them in place.
- Construct and install the header: The header is a horizontal beam that spans the top of the door opening, supporting the weight of the wall above. To construct the header, cut two 2x4s to the width of the rough opening plus 3 inches. Sandwich a piece of 1/2-inch plywood or oriented strand board (OSB) between the 2x4s, creating a beam. Install the header above the jack studs, nailing it securely to the king studs.
- Ensure squareness and level: Before moving on, double-check the frame for squareness and level. Use a carpenter’s square to ensure the corners are at right angles, and a level to verify that the header and sole plate are perfectly horizontal. Make any necessary adjustments to maintain the frame’s alignment.
When installing an exterior door in a block wall, consider using a welded frame with anchors or a hollow metal frame for simplicity. Utilize Tapcon screws for securing, and remember to shim during installation. Drill into the block with a hammer drill, ensuring the frames align correctly with planned siding and drywall.
Got it all nailed down? Let’s make sure everything’s looking spot on and finish it up right.
Finalizing the Frame
With the main components of the frame in place, it’s time to add the finishing touches:
- Nail the jack studs: Drive nails through the jack studs into the king studs at an angle, creating a secure connection known as toe-nailing.
- Install cripple studs: Cripple studs are short vertical 2x4s that run from the header to the top plate and from the sole plate to the bottom plate. They provide additional support and stability to the frame. Cut cripple studs to the appropriate length and install them at regular intervals, typically spaced 16 inches apart.
- Cut and remove the sole plate: Using a reciprocating saw or handsaw, carefully cut and remove the portion of the sole plate that extends across the door opening. This will allow for a seamless transition between the floor and the door threshold.
- Final check for squareness: Before proceeding to installation, perform a final check for squareness and make any necessary adjustments. A square and level frame is essential for proper door operation and a professional-looking finish.
For wide openings without replacing the entire load-bearing support structure, consider adding a ‘false header’ inside the existing framing setup. This allows accommodating pre-hung doors by shimming the gaps without compromising structural integrity. Select a door that fits snugly, ensuring proper clearance and ease of installation.
Ready to see it all come together? Let’s get that door swinging!
Installation and Finishing Touches
With the frame complete, it’s time to install your pre-hung door and add the finishing touches that will make your custom closet truly stand out:
- Position and secure the frame: Carefully position the assembled frame within the rough opening, ensuring it is plumb and level. Use shims to make any necessary adjustments and to create even gaps around the frame. Once the frame is properly aligned, secure it in place using nails driven through the frame and into the rough opening.
- Ensure proper clearance: Check the gaps around the door to ensure even clearance on all sides. This is essential for smooth door operation and prevents binding or sticking.
- Secure the frame to the floor: If your door frame extends to the floor, consider securing it to the floor for added stability. This is particularly important for heavy or frequently used doors. Use a floor anchor or a small L-bracket to attach the frame to the floor, ensuring it remains level.
- Seal and finish: To create a polished and seamless look, seal any gaps between the frame and the wall with caulk or sealant. This not only enhances the appearance but also helps to prevent drafts and improve energy efficiency. Finally, apply your desired finish to the frame, whether it’s paint, stain, or a decorative trim.
When adding doors to a wide opening with existing trim, remove the trim to install new doors properly. Pre-hung double doors can fit the width close to desired dimensions and should involve new trims for a complete finish.
Wrap-up
By following these detailed steps and paying close attention to precision and quality, you can create a well-framed door opening that serves as the perfect foundation for your custom closet doors. A properly constructed frame not only ensures the longevity and functionality of the door but also elevates the overall aesthetic of your closet design.
At Paniflex, we understand the importance of seamless integration between door frames and our custom closet door solutions. That’s why we offer a wide range of styles, materials, and customization options to suit every design vision. From sleek and modern bifold doors to elegant sliding doors, our collection is designed to complement your well-crafted door frames.
To further assist you in your custom closet projects, we provide a wealth of resources, including detailed installation guides and instructional videos. Our team of experts is also available to offer personalized guidance and support throughout your project, ensuring your success every step of the way.
Elevate your custom closet designs with Paniflex’s premium door solutions and expert craftsmanship. Visit our website to explore our extensive range of options and discover how Paniflex can help you bring your vision to life. With our commitment to quality and your skilled door frame construction, you’ll create custom closets that exceed your clients’ expectations and showcase your expertise as an interior designer or architect.


