Have you ever wondered how a simple door replacement could transform living spaces and elevate your design projects? As an interior designer or architect, you know that doors are more than just functional elements—they’re pivotal in defining the aesthetics and flow of a space.
Whether working on a residential renovation or a commercial redesign, mastering the art of door replacement can be a game-changer for your projects.
In this comprehensive guide, you’ll learn how to replace exterior and interior doors, empowering you to tackle this transformative task confidently. From selecting the perfect door to achieving a flawless installation, this article covers every step of the journey, helping you create spaces that truly stand out.
Preparation and Tools

Before you embark on your door replacement journey, gathering all the necessary tools and materials is crucial. Being well-prepared will ensure a smooth and efficient process, allowing you to focus on the craftsmanship of your installation. Here’s what you’ll need for it:
- Miter saw
- Drill and drill bits
- Tape measure
- Caulk gun and caulk
- Level
- Pry bar
- Utility knife
- Chisel
- Screwdrivers (flathead and Phillips)
- Hammer
- Safety glasses and work gloves
For exterior door replacements, also include the following:
- Weatherstripping
- Exterior-grade sealant
- Flashing tape
Pro tip: Consider using a door installation kit for a streamlined process when you replace doors. These kits often include shims, a strike plate, and other helpful accessories to ensure you have all the necessary components.
Now that your tools are ready, it is time to put them to use by taking precise measurements.
Measure the Existing Door
Accurate measurements form the foundation of a successful door replacement. By taking the time to measure carefully, you’ll avoid costly mistakes and ensure a perfect fit for your new door. Follow the steps below to get it right.
- Determine the door swing direction.
- Measure width, height, and thickness at multiple points.
- Note hinge locations and sizes.
- Measure for door hardware placement.
Remember, when you replace doors, it’s crucial to measure the rough opening rather than just the door itself.
Done? Congratulations! You have the basics of measurements in hand and are ready to select the perfect door for your space.
Choose a New Door (Selection Tips)
Selecting the right door is a crucial step in your replacement project. The door you choose will affect the space’s functionality and contribute significantly to its overall aesthetic. Let’s review some considerations before you make your selection.
Consideration 1: Hollow Core vs. Solid Core Doors
Hollow-core and solid-core doors both have their uses, and it’s important to correlate them with the correct space.
- Hollow core: Lighter and more affordable, ideal for interior spaces.
- Solid core: Better insulation and durability, suitable for exterior use or noise-sensitive areas.
Alright, you’ve nailed the core decision. But hold on, we’re not done yet! Let’s talk about something that’ll really make your doors pop – panel styles. This is where you get to flex those creative muscles and truly make a statement.
Consideration 2: Panel Style Selection
Choosing a style that complements your design ensures that your vision and the final product match. Here’s a list of designs corresponding to their looks.
- Flat panel for modern aesthetics
- Raised panel for traditional looks
- Glass panel to allow light flow
Great job picking out that perfect panel style! We’ve got one more crucial element to tackle – hardware. Think of it as the jewelry for your doors. Let’s make sure your doors are dressed to impress!
Consideration 3: Hardware Selection
It’s important to select hardware that enhances style and functionality. The following checklist will help you make the right choice:
- Consider various finishes (brushed nickel, oil-rubbed bronze, matte black)
- Choose lever handles for better accessibility
- Prioritize high-security locks for exterior doors
When you select doors, consider the overall design cohesion of the space. Consider Paniflex’s range of customizable closet doors to elevate your design with custom solutions. Our bifold and sliding door options offer versatility and style to complement any interior design scheme.
So, are you ready to place your order?
Order or Purchase the Replacement Door
When ordering doors for your replacement project, you’ll encounter two main options, each with its considerations. Let’s dive in and understand them.
- Slab doors are ideal if you keep the existing frame and want to update the door’s appearance or material. They offer more flexibility in terms of customization and can be a cost-effective choice if your current frame is in good condition.
- Prehung doors are a complete package, including the door, frame, and hinges. They are often easier to install, especially for those with less experience in door replacement. They’re an excellent choice if you’re replacing both the door and frame or if your current frame is damaged or outdated.
Paniflex’s custom door solutions ensure a perfect fit and finish, eliminating common installation headaches when you replace doors.
Tip: Provide the following details when ordering to ensure there are no replacement headaches!
- Exact measurements (width, height, thickness)
- Door swing direction
- Material preference
- Desired finish
- Any special features (soundproofing, fire rating)
And remember to double-check all measurements before placing your order!
Are you done placing your order? Great! Your new door is on its way. While you wait, let’s prep the existing door for removal.
Remove the Existing Door
It’s time to get organized. Label each door clearly with its intended location to streamline the installation process later. This step is especially crucial if you’re replacing multiple doors.
Once you’ve done this, follow the steps below to remove the old door.
- Remove the door from the hinges.
- If replacing the frame, score along trim edges.
- Carefully pry off the trim.
- Remove the shims and nails holding the frame.
- Take out the old frame.
Need help? This tutorial demonstrates, replacing an interior door can be a straightforward DIY project with the proper guidance.
Also Read: Step By Step Guide: How to Replace a Door Frame
With the old door out of the way, it’s time to make any necessary cuts to ensure your new door fits perfectly.
Measuring and Cutting
Alright, you’ve picked the perfect door, chosen a stunning panel style, and selected hardware that would make even the pickiest designer swoon. But hold your horses! We’re not quite ready to hang that beauty just yet. Now comes the part that separates the DIY dabblers from the true craftsmen – measuring and cutting.
There is nothing more frustrating than realizing your dream door is a quarter-inch too wide for the frame. So grab your tape measure and put on your precision hat and measure the following:
- For height: Measure, mark, and use a circular saw to cut.
- For width: Use a plane or belt sander on both sides.
Did you get your door cut to size? Great, let’s get that hardware installed for a perfect fit.
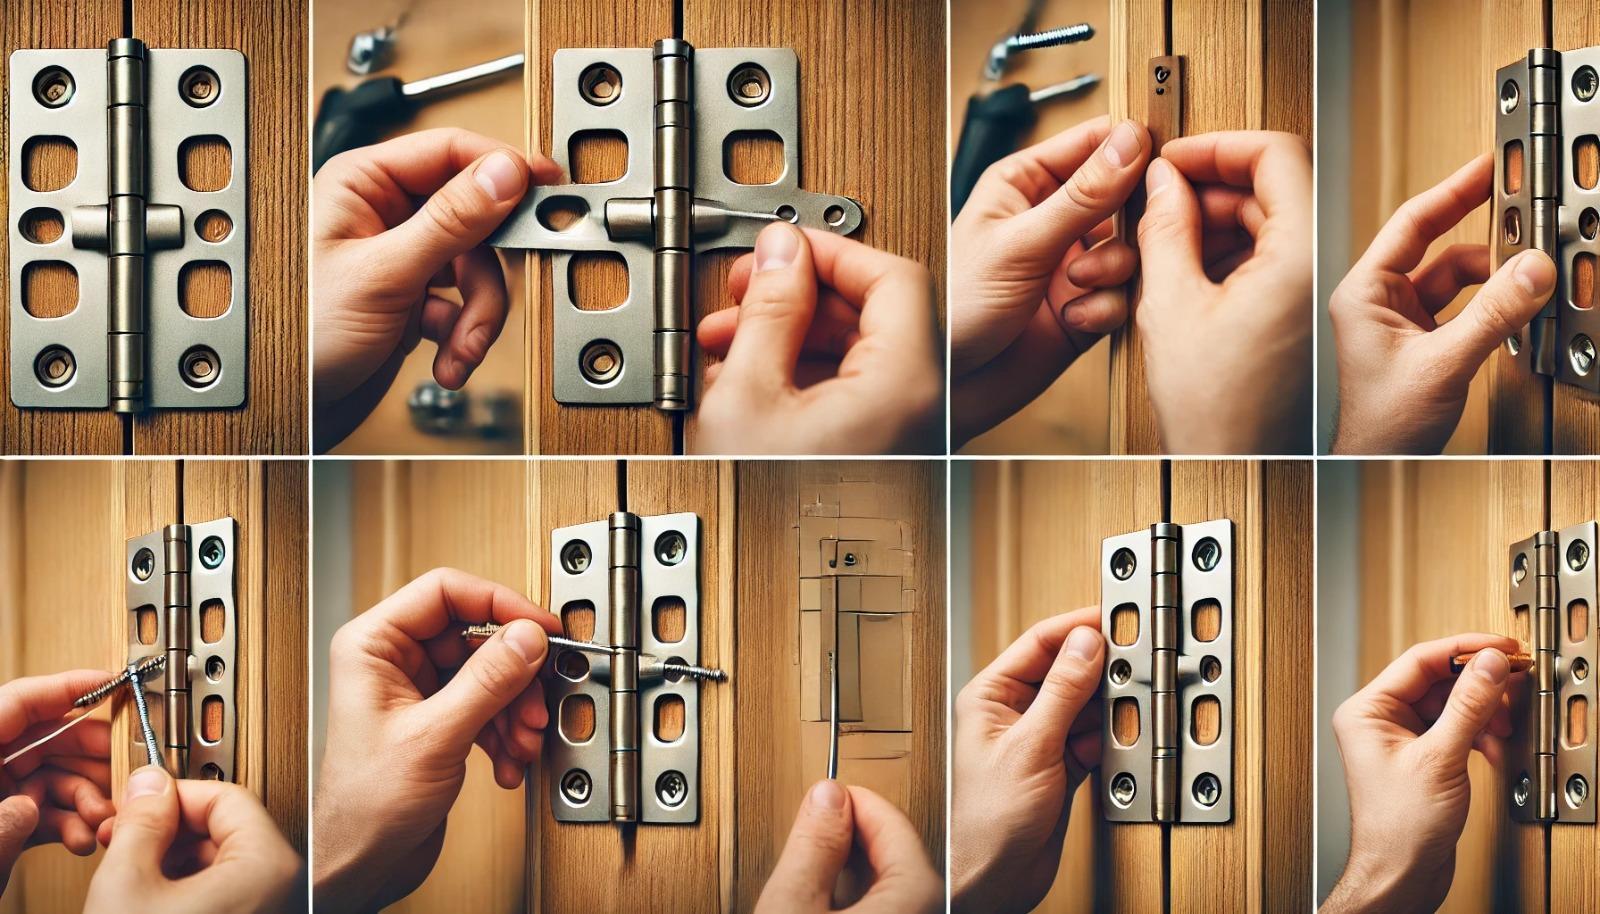
Installing Hardware
Okay, so you’ve measured twice, cut once (hopefully!), and your door is fitting snugly in its frame. Now roll up your sleeves, get the installation right, and your client’s will be swinging that door open and closed with a smile of satisfaction for years to come!
Follow the checklist below to ensure a professional finish.
- Mark and chisel areas for hinges.
- Attach hinges to the door, then frame.
- Use the manufacturer’s template for lockset installation.
- Install latch plate and strike plate, ensuring alignment.
Hardware installed? Perfect. Now, let’s go ahead and put everything together.
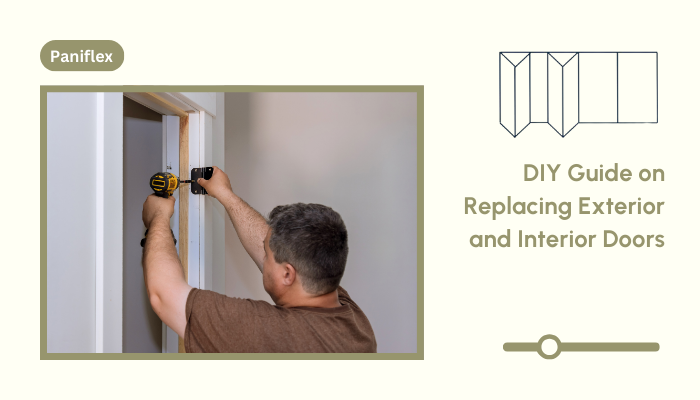
Finish & Install Replacement Door
You’re in the home stretch! That final stretch can be the most taxing, can’t it? The pointers below will help you take that final step and replace your doors in inch-perfect fashion.
- Paint or stain unfinished doors before installation.
- Position the door in the frame, using shims for level and plumb.
- Secure the door with screws through the frame and shims.
- Test door operation.
- Install weatherstripping for exterior doors.
Reddit users recommend first removing the trim and measuring the rough framing of the current doors to avoid issues with fit. They also note that prehung doors might be significantly more straightforward to install.
Also Read: How to Install and Replace Closet Doors
Everything coming together nicely? You have just a few finishing touches left.
Sealing and Finishing Touches
Proper sealing is like giving your door a suit of armor. It protects against moisture, which is Public Enemy No. 1 for doors. Without this crucial step, you’re basically inviting warping, swelling, and even rot to set up shop. To avoid complications, take these final steps:
- Apply caulk around the exterior trim.
- Install a door sweep for exterior doors.
- Touch up paint or finish.
- Clean door and hardware.
And there it is! A new door is officially installed! If you’ve done your job right, your client is giving you a shining smile. But some clients may have a few doubts about the door you’ve just installed!
Let’s make sure your knowledge is on point by addressing some frequently asked questions.
FAQ: Understanding Solid Core vs. Solid Wood Doors
Q1: What’s the difference between solid core and solid wood doors?
A: Solid wood doors are made entirely of natural wood, while solid core doors have a core of engineered wood or composite materials with a wood veneer exterior. Solid core doors offer better sound insulation and stability, while solid wood doors provide a premium, natural look.
Q: Which is more durable?
A: Solid core doors are generally more resistant to warping and moisture damage, making them ideal for bathrooms or exterior use. Solid wood doors, while beautiful, may require more maintenance to prevent warping in humid environments.
Q: How do they affect the overall design of a space?
A: Both types can enhance a space’s aesthetics. Solid wood doors offer a luxurious, natural look that can be a focal point in high-end designs. Solid core doors provide a clean, consistent appearance and are versatile enough to complement various design styles.
Q: What about cost considerations?
A: Solid core doors are typically more affordable than solid wood doors, making them popular for projects with budget constraints. However, solid wood doors can add significant value to high-end properties.
Conclusion
Replacing doors can be a transformative project, dramatically enhancing the functionality and aesthetics of any space. This guide equips you with the knowledge to replace doors confidently, whether for residential or commercial projects.
Careful planning, precise measurements, and attention to detail during installation are critical to a successful door replacement. For complex installations or custom solutions, consider professional help and contact the experts at Paniflex.
We’d love to hear about your experiences as you replace doors! Share your stories, challenges, and triumphs.


